Hello. I am an Android app developer on the Wadiz App Development Team.
We recently added a feature to Instagram Stories that lets you show off your crowdfunding receipts or store receipts. I’d like to share the development process behind it.
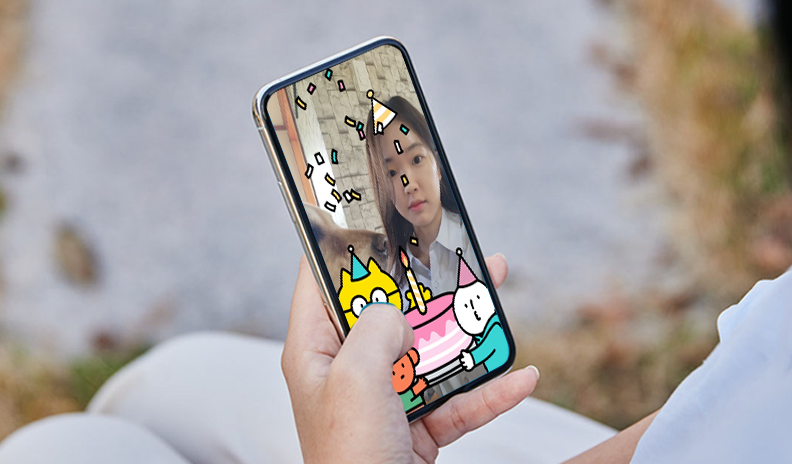
When you back a project or make a purchase in the store, a receipt featuring the product’s image, title, and date will be generated, and you’ll see a simulation of it being printed. By tapping the character selection button on the right, you can choose to switch to one of Wadizmascot characters: Jinguk, Genie, or Joy. Once you’ve selected a receipt you like, you can download it or share it on your Instagram Story.

The development process can be broadly divided into animation and rendering. We were able to implement this using MotionLayout, MediaMuxer, and MediaCodec, which are provided by Android.
Animation Implementation: MotionLayout
public class MotionLayout extends ConstraintLayout
First introduced at Google I/O 2018, MotionLayout is a subclass of ConstraintLayout and a ViewGroup that allows you to add various animations. While there were already several ways to create animations before, MotionLayout is extremely convenient because it offers a combination of features and is easy to use.

If your existing screen was built using ConstraintLayout, applying MotionLayout is very simple. First, switch from ConstraintLayout to MotionLayout. Then, app:layoutDescription Include the XML resource file that defines the motionScene using attributes. If a MotionLayout subview is also defined within the motionScene, the definition within the motionScene takes precedence.
<?xml version="1.0" encoding="utf-8"?>

<!-- activity_main.xml --> <androidx.constraintlayout.motion.widget.MotionLayout

  android:layout_width="match_parent"

  android:layout_height="match_parent"

app:layoutDescription="@xml/motion_scene">
<!-- 하위 뷰 -->

   <View

             android:id="@+id/button"

             android:layout_width="64dp"

             android:layout_height="64dp"

             android:text="Button" />

</androidx.constraintlayout.motion.widget.MotionLayout>
The Motion Scene XML file is located at the root <MotionScene> It consists of a ConstraintSet, a Transition, and their child elements.
<ConstraintSet>: Based on a specific point in a motion sequence, multiple<Constraint>Specifies the position and properties of all views, including<Constraint>: Defines the position and properties of the view.<Transition>: Defines the start and end points of defined ConstraintSets, as well as user interactions.<onClick>: Defines the action to be performed when a specific view is clicked.<onSwipe>: Defines the action to be performed when a specific view is swiped.<KeyFrameSet>,<KeyPosition>,<KeyAttribute>: Specify additional detailed motions frame by frame.
To summarize, regarding points A and B at the start of the animation ConstraintSetCreate each of them. Then, A and B TransitionWhen connected in this way, MotionLayout makes the transition between the two states appear smooth and natural.

When MotionLayout was first introduced, you had to write MotionScenes directly in XML files. However, with the addition of the Motion Editor in the Android Studio 4.0 update, it became much easier to design animations.


There are four cards in total. Each card defines a specific point in the motion sequence. ConstraintSet. The arrows connecting each card indicate the start and end of the motion. Transition . The dotted arrows indicate motion branching from another ConstraintSet (deriveConstraintsFrom)
I broke down the animation of the receipt being printed, defined a total of four ConstraintSets for each motion, and linked them using transitions.
Every transition is autoTransition="animatedToEnd" Since the attribute is defined, the animation will automatically move on to the next transition once it finishes.
First Transition: The receipt slides down, and a hand rises from the bottom to the top starting from the middle.
By connecting ConstraintSets with different heights, the receipt will feed down from top to bottom.
I set the keyFrameSet so that the hand starts to rise from the middle of the frame.
motionInterpolator="easeInOut"I defined the property to specify the animation acceleration.
Second Transition: The receipt twists counterclockwise and tears apart.
- By setting the KeyFrameSet, the receipt rotates.
- At frame 0, the receipt rotation angle is 0°
- Rotation angle of the receipt at 100 frames: -2°
Third Transition: A 1-second pause
- When creating a ConstrainSet, using the `deriveConstraintsFrom` property allows you to create motion derived from the specified ConstrainSet, thereby reducing code duplication without the need for additional property definitions.
duration="1000"When this property is set, the object appears frozen for 1 second.
Fourth Transaction: Return to the beginning and repeat the animation
autoTransition="jumpToEnd"When you define a property, it moves directly to `constraintSetEnd` without any motion.

Rendering: MediaCodec & MediaMuxer
Once you’ve implemented all the animations, you’ll need to convert the screen into a video. While you could use MediaProjection, screen recording isn’t the most user-friendly option. So, I chose to extract images for each animation frame and compile them into a video. This process is called rendering, and you can create simple videos using the APIs provided by Android.
Android API
MediaCodec: Responsible for encoding and decoding video and audio
MediaMuxer: The role of writing the encoded buffer
MediaFormat: Contains information about the video format and the MediaCodec used
Rendering generally involves the following steps. Let me briefly summarize each one.
- Create an MP4 file
- Setting Up MediaCodec and MediaMuxer
- Encode the bitmap and import it into MediaMuxer
- End
1. Create an MP4 file
After specifying the title, MIME type, and save path of the file to be created, call the `insert` method of the `ContentResolver`.
val contentValues = ContentValues().apply {

             put(MediaStore.MediaColumns.DISPLAY_NAME, title)

             put(MediaStore.MediaColumns.MIME_TYPE, "video/mp4")

}

if (Build.VERSION.SDK_INT >= Build.VERSION_CODES.Q) {

             contentValues.put(MediaStore.MediaColumns.IS_PENDING, 1)

} else {

             val dir = Environment.getExternalStoragePublicDirectory(Environment.DIRECTORY_MOVIES)

             .toString()

             val videoFile = File(dir, "${title}.mp4")

             contentValues.put(MediaStore.Video.Media.DATA, videoFile.absolutePath)

}

val videoContentUri: Uri =

if (Build.VERSION.SDK_INT >= Build.VERSION_CODES.Q) {

             MediaStore.Video.Media.getContentUri(MediaStore.VOLUME_EXTERNAL_PRIMARY)

} else {

             MediaStore.Video.Media.EXTERNAL_CONTENT_URI

}

return context.contentResolver.insert(videoContentUri, contentValues)
2. Setting up MediaCodec and MediaMuxer
To find an encoder supported by the device, retrieve the encoder that matches the mimeType ("video/avc") from MediaCodecList.
private fun getCodecForMimeType(): MediaCodecInfo? {

             val mediaCodecList = MediaCodecList(MediaCodecList.REGULAR_CODECS)

             val codecInfoList = mediaCodecList.codecInfos.filter {

                          it.supportedTypes.contains(mimeType)

             }

             return codecInfoList.find { it.isEncoder }

}
Create a MediaCodec object using the name of the imported codec.
MediaCodec.createByCodecName(mediaCodecName)
After creating a MediaCodec, create a MediaFormat and configure it by adding it to the codec.
mediaCodec.configure(mediaFormat, null, null, MediaCodec.CONFIGURE_FLAG_ENCODE)
The MediaFormat object accepts data such as the video's MIME type, width, height, bitrate, frame rate, and color information.
- Bit rate: The number of bits processed per second
- frame rate: the number of images displayed per second
mediaCodec.start()Calling this method prepares the codec for use.
Create a FileDescriptor using the URI of the file created earlier, and pass it to the constructor along with the OutputFormat settings.
MediaMuxer(fileDescriptor, MediaMuxer.OutputFormat.MUXER_OUTPUT_MPEG_4)
3. Encode as a bitmap and import into MediaMuxer
Extract a bitmap from the View for each animation frame.
Since the animation was created using MotionLayout, setProgress() You can use a function to display a specific frame on the screen.
recordCopyViewBinding.clRecordView.progress = progress

getBitmapFromView(width, height)?.let { // 추출해야 하는 타깃 뷰로부터 Bitmap을 생성

             bitmapToVideoEncoder.encode(it)

}

The extracted bitmap is placed into MediaCodec's InputBuffer and encoded by the codec.
mediaCodec.queueInputBuffer(inputBufIndex, 0, byteConvertFrame.size, ptsUsec, 0)
You can retrieve the encoded data from MeidaCodec's OutputBuffer.
mediaCodec.getOutputBuffer(encoderStatus)
Add it to MediaMuxer.
mediaMuxer.writeSampleData(mTrackIndex, encodedData, mBufferInfo)
Once an OutputBuffer has been used, call `release()` to free it up for reuse.
mediaCodec.releaseOutputBuffer(encoderStatus, false)
4. End
Call the stop() and release() methods of MeidaCodec and MediaMuxer, respectively.
mediaCodec.stop()

mediaCodec.release()

mediaMuxer.stop()

mediaMuxer.release()
Use the contentResolver to close the file.
private fun closeMedia(uri: Uri) {

             val contentValues = ContentValues()

             if (Build.VERSION.SDK_INT >= Build.VERSION_CODES.Q) {

                          contentValues.put(MediaStore.MediaColumns.IS_PENDING, 0)

             }

             try {

                          context.contentResolver.update(uri, contentValues, null, null)

             } catch (e: Exception) {

             e.printStackTrace()

             }

}
While working on the project
The most challenging part was video rendering, which was a first for me. In particular, optimizing for various devices involved a lot of considerations, so I had to think it through carefully. There were also many bugs, but the following two stood out the most.
First, Bitmap Memory Management
Bitmap Memory Management | Android Developers | Android Developers
Bitmap memory is such an important factor that it has its own dedicated page in the Android development documentation. For this project, we ended up creating over 100 bitmaps to ensure smooth video frames. If we were to keep all of these bitmaps in a list at once, OutOfMemoryError An error might have occurred. To avoid this, I started MediaCodec and MediaMuxer first, then loaded the bitmaps one by one. To free up memory quickly, recycle()I set it up to call that.
Although implementing it synchronously does take a bit of time, it ensures that it runs smoothly even on low-spec devices.
Second, codec optimization for low-spec devices
On low-end devices, limitations in supported codec performance may prevent rendering or cause playback issues. (Galaxy J7 codec screenshot) To resolve this, we modified the system to ensure videos are encoded at the appropriate resolution based on the information for each codec in the MediaCodecList.
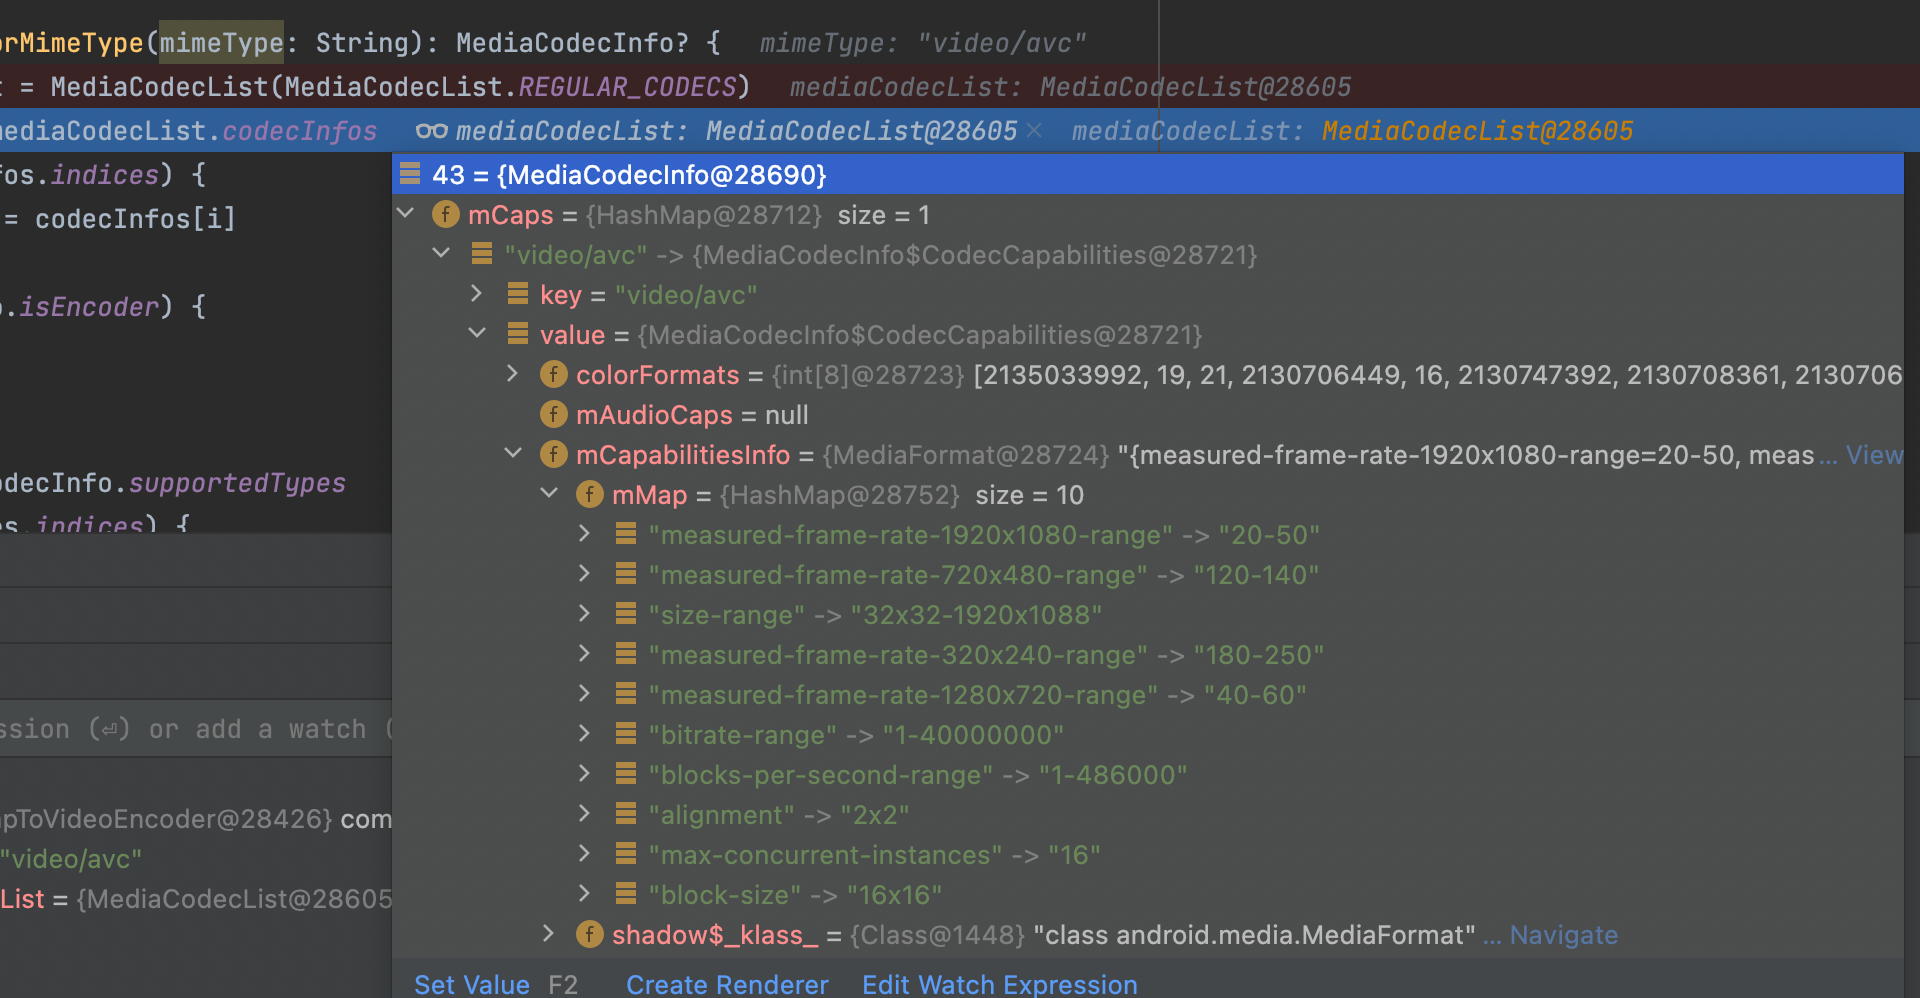
Resolution support range available in MediaCodecInfo
If you encode at a fixed resolution or a resolution that's too low, the pixels may appear pixelated. That's why device optimization is important!
I really enjoyed working on this challenging and exciting project. It was a meaningful project from which I learned a lot. Thank you to all the senior developers who provided so much help. 😊
Do you still have questions? 👀
Curious about the app development team’s culture? 👉Click here
Who’s the star of the Wadiz Praise Relay in the app development team? 👉Click here